Add, manage, and assign permissions to members within your VidSell community.
Community Types
You can add members to your communities in a few ways, depending on how your community is set up inside your settings and your overall strategy.
Paid/Gated Communities (Tag Restricted)
For communities that have paid, or restricted/gated content (for example courses only paying members should access) tag restricted communities are recommended.
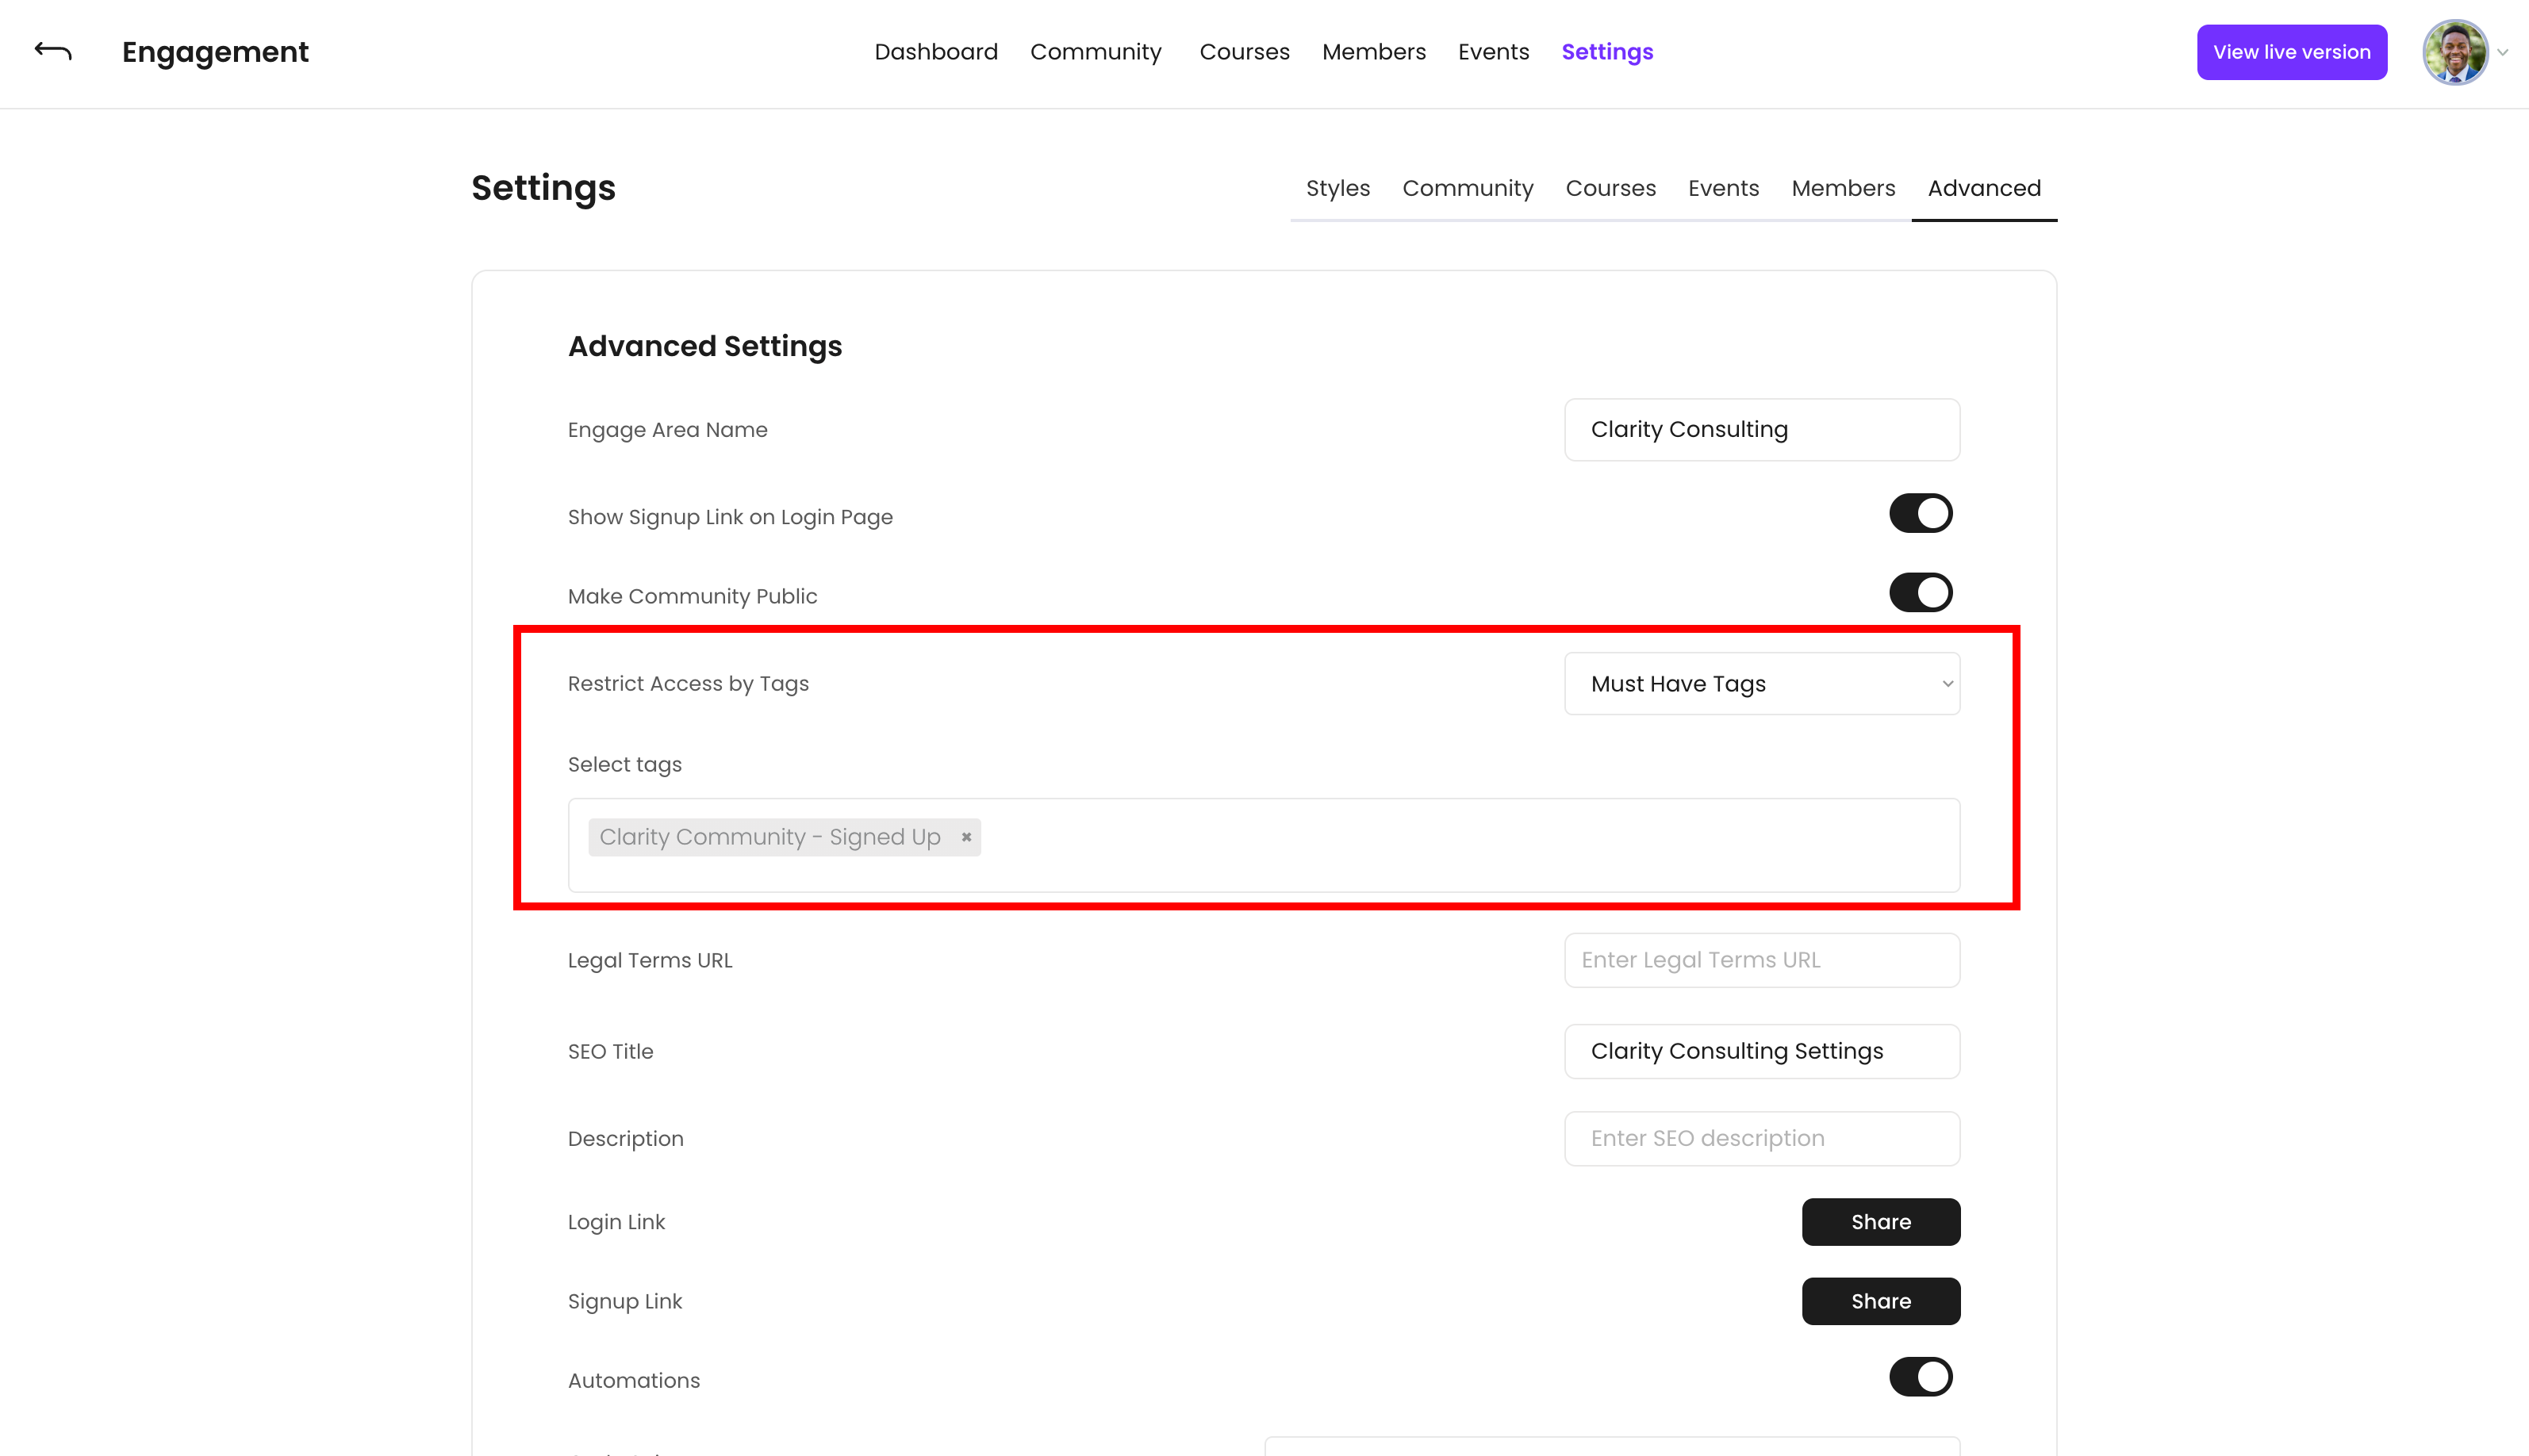
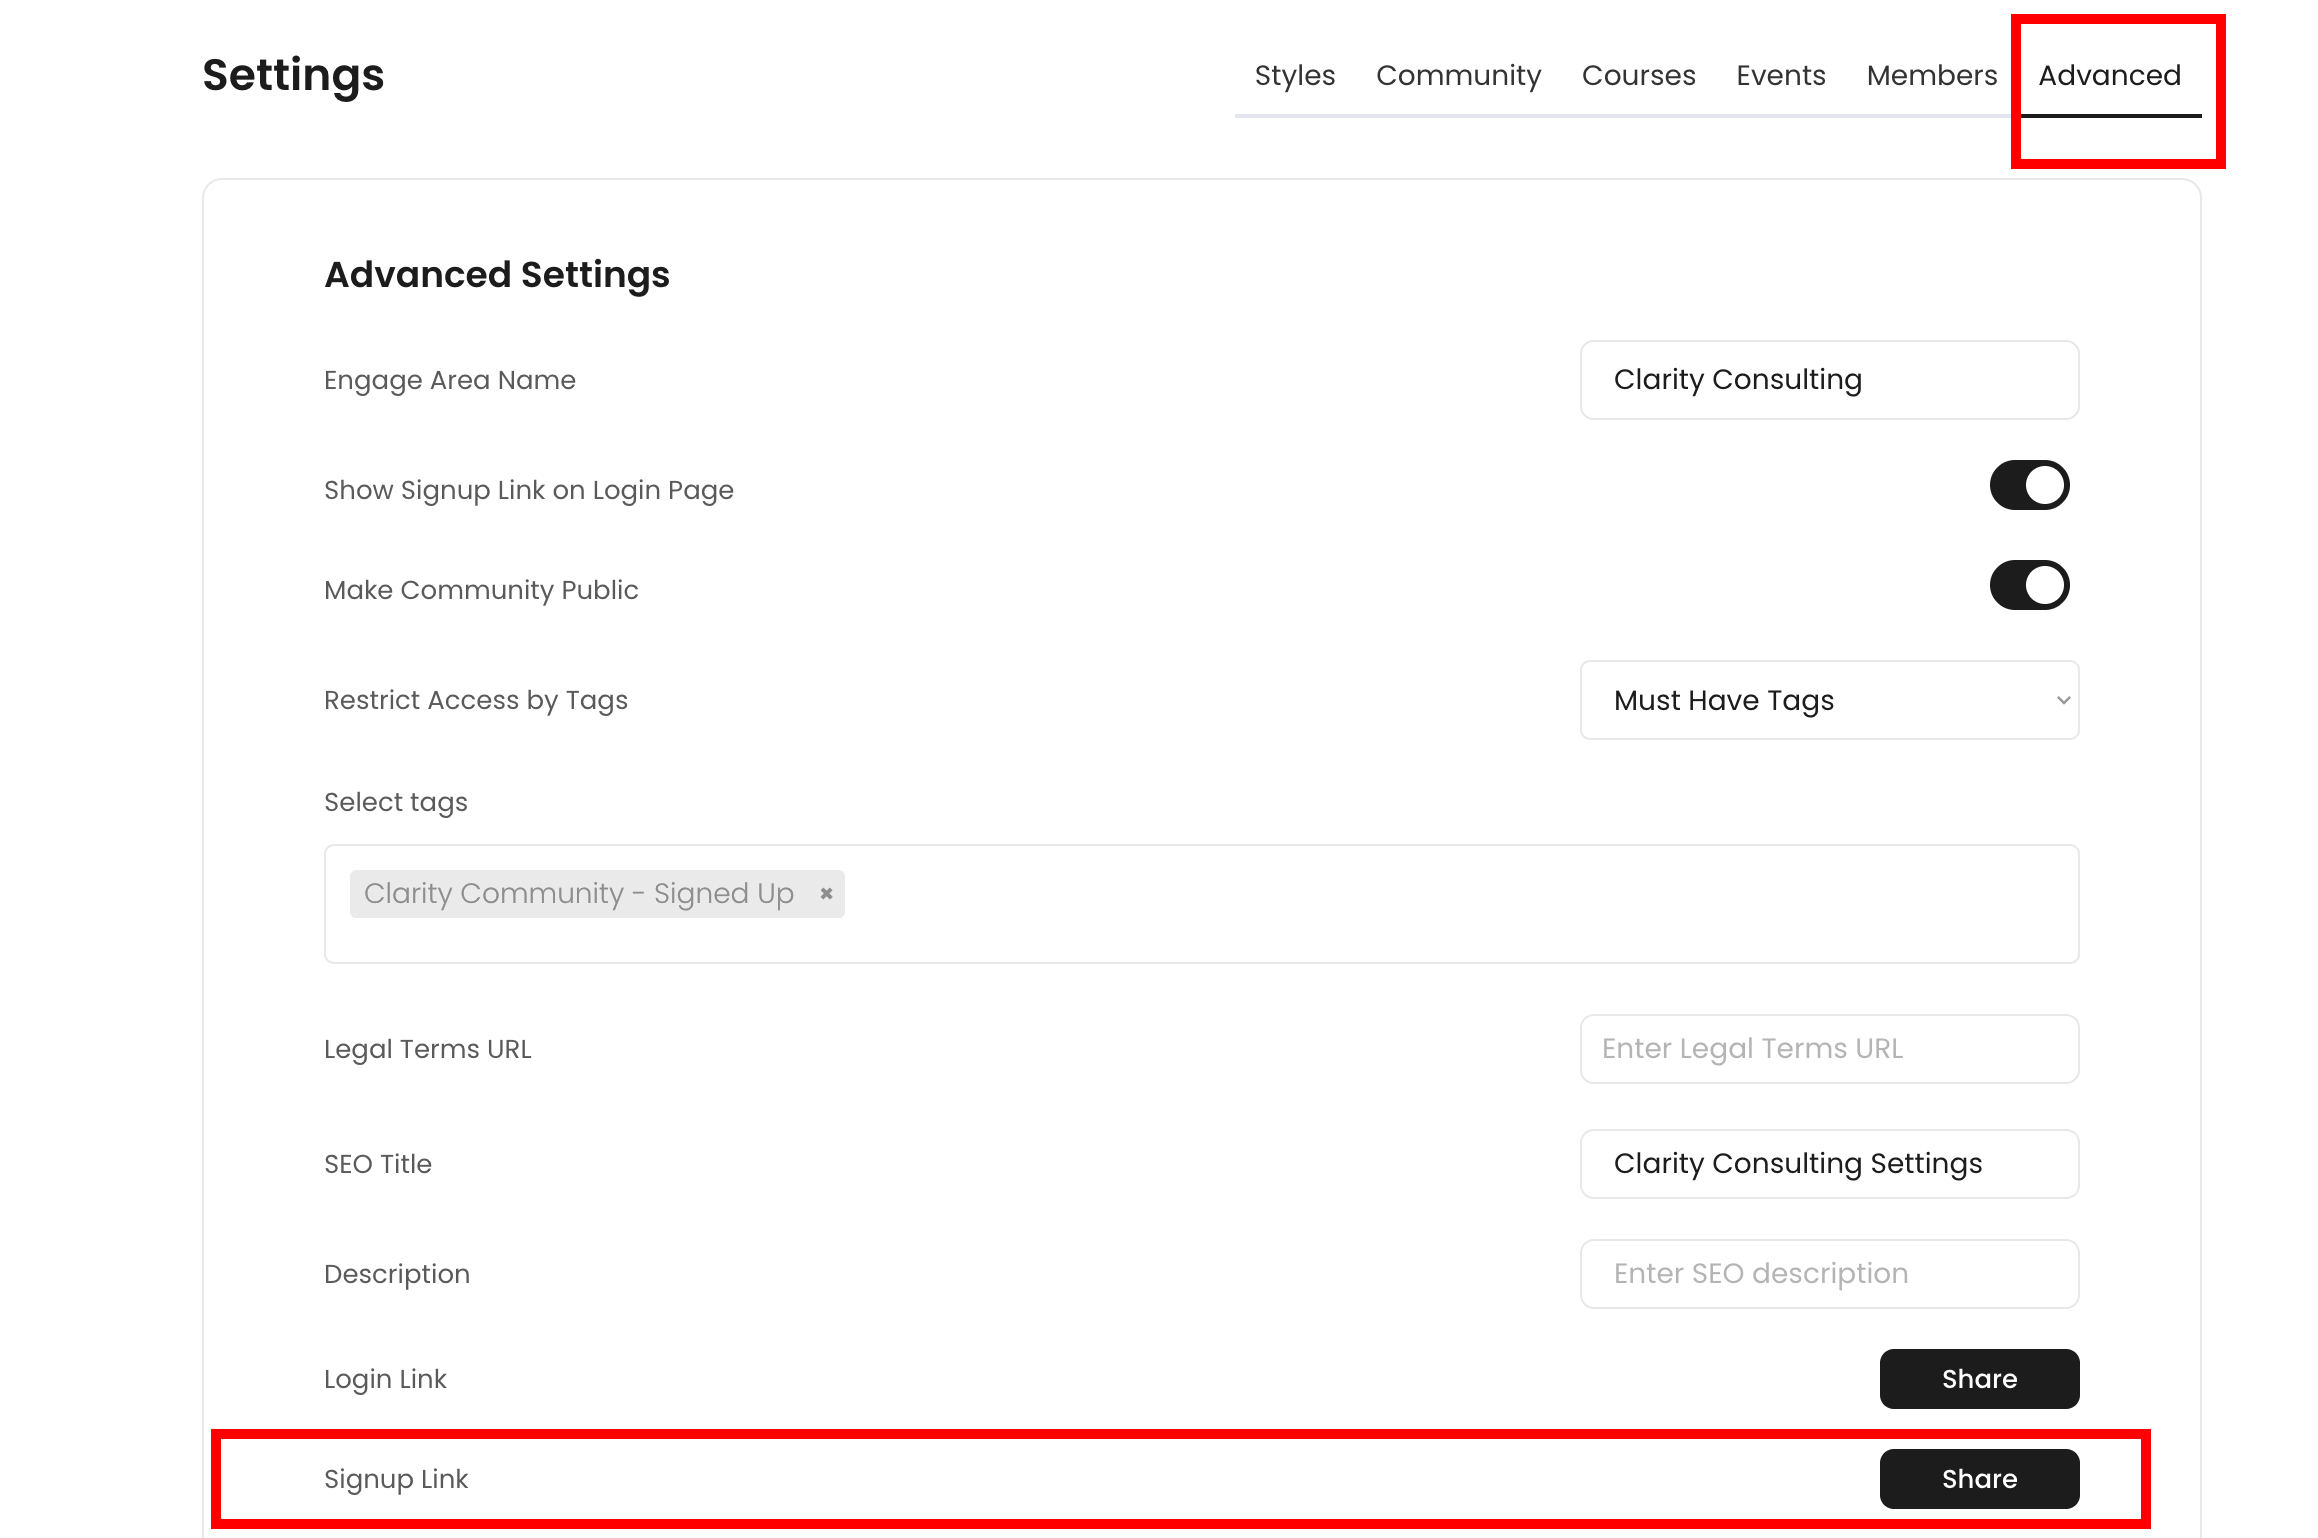
To make your community accessible only to those who have specific tags, turn on the option "Restrict Access by Tags" inside of Advanced Settings, and choose the access tags needed to see the content inside.
Free/Non-Gated Communities (Non-Tag Restricted)
For free, freemium (some gated content inside), or public facing communities no tag restriction is needed.
Adding Members to your Community
There are multiple ways members can join your online communities - either through directly signing up, or by invitation depending on if your community is tag restricted or not.
Direct Member Signups (Tag Restricted)
Share access to your community so members can sign up themselves.
- Flows - Flows are the primary way for you to sell access to communities. To sell community access using Flows:
- Apply all of the necessary access tags at checkout in your Flow's Automations tab
- Then share your community Signup Link after purchase.
- From there, all necessary tags will be applied to new community signups.
- Community landing pages (Public community spaces) - Create one public facing community space, and then link to a Flow using an on-page CTA to sell access to your community
Direct Member Signups (Non-Tag Restricted)
You can give direct access to your community through the Signup Link in Advanced Settings. This allows members to join directly with one link, but will not apply tags to new members.
Inviting Members
You can directly invite members to your community by clicking the "Add Members" button from inside of the Members Area. This option will send out a custom email invitation (on your own domain if set up inside of your workspace) where members can sign up from.
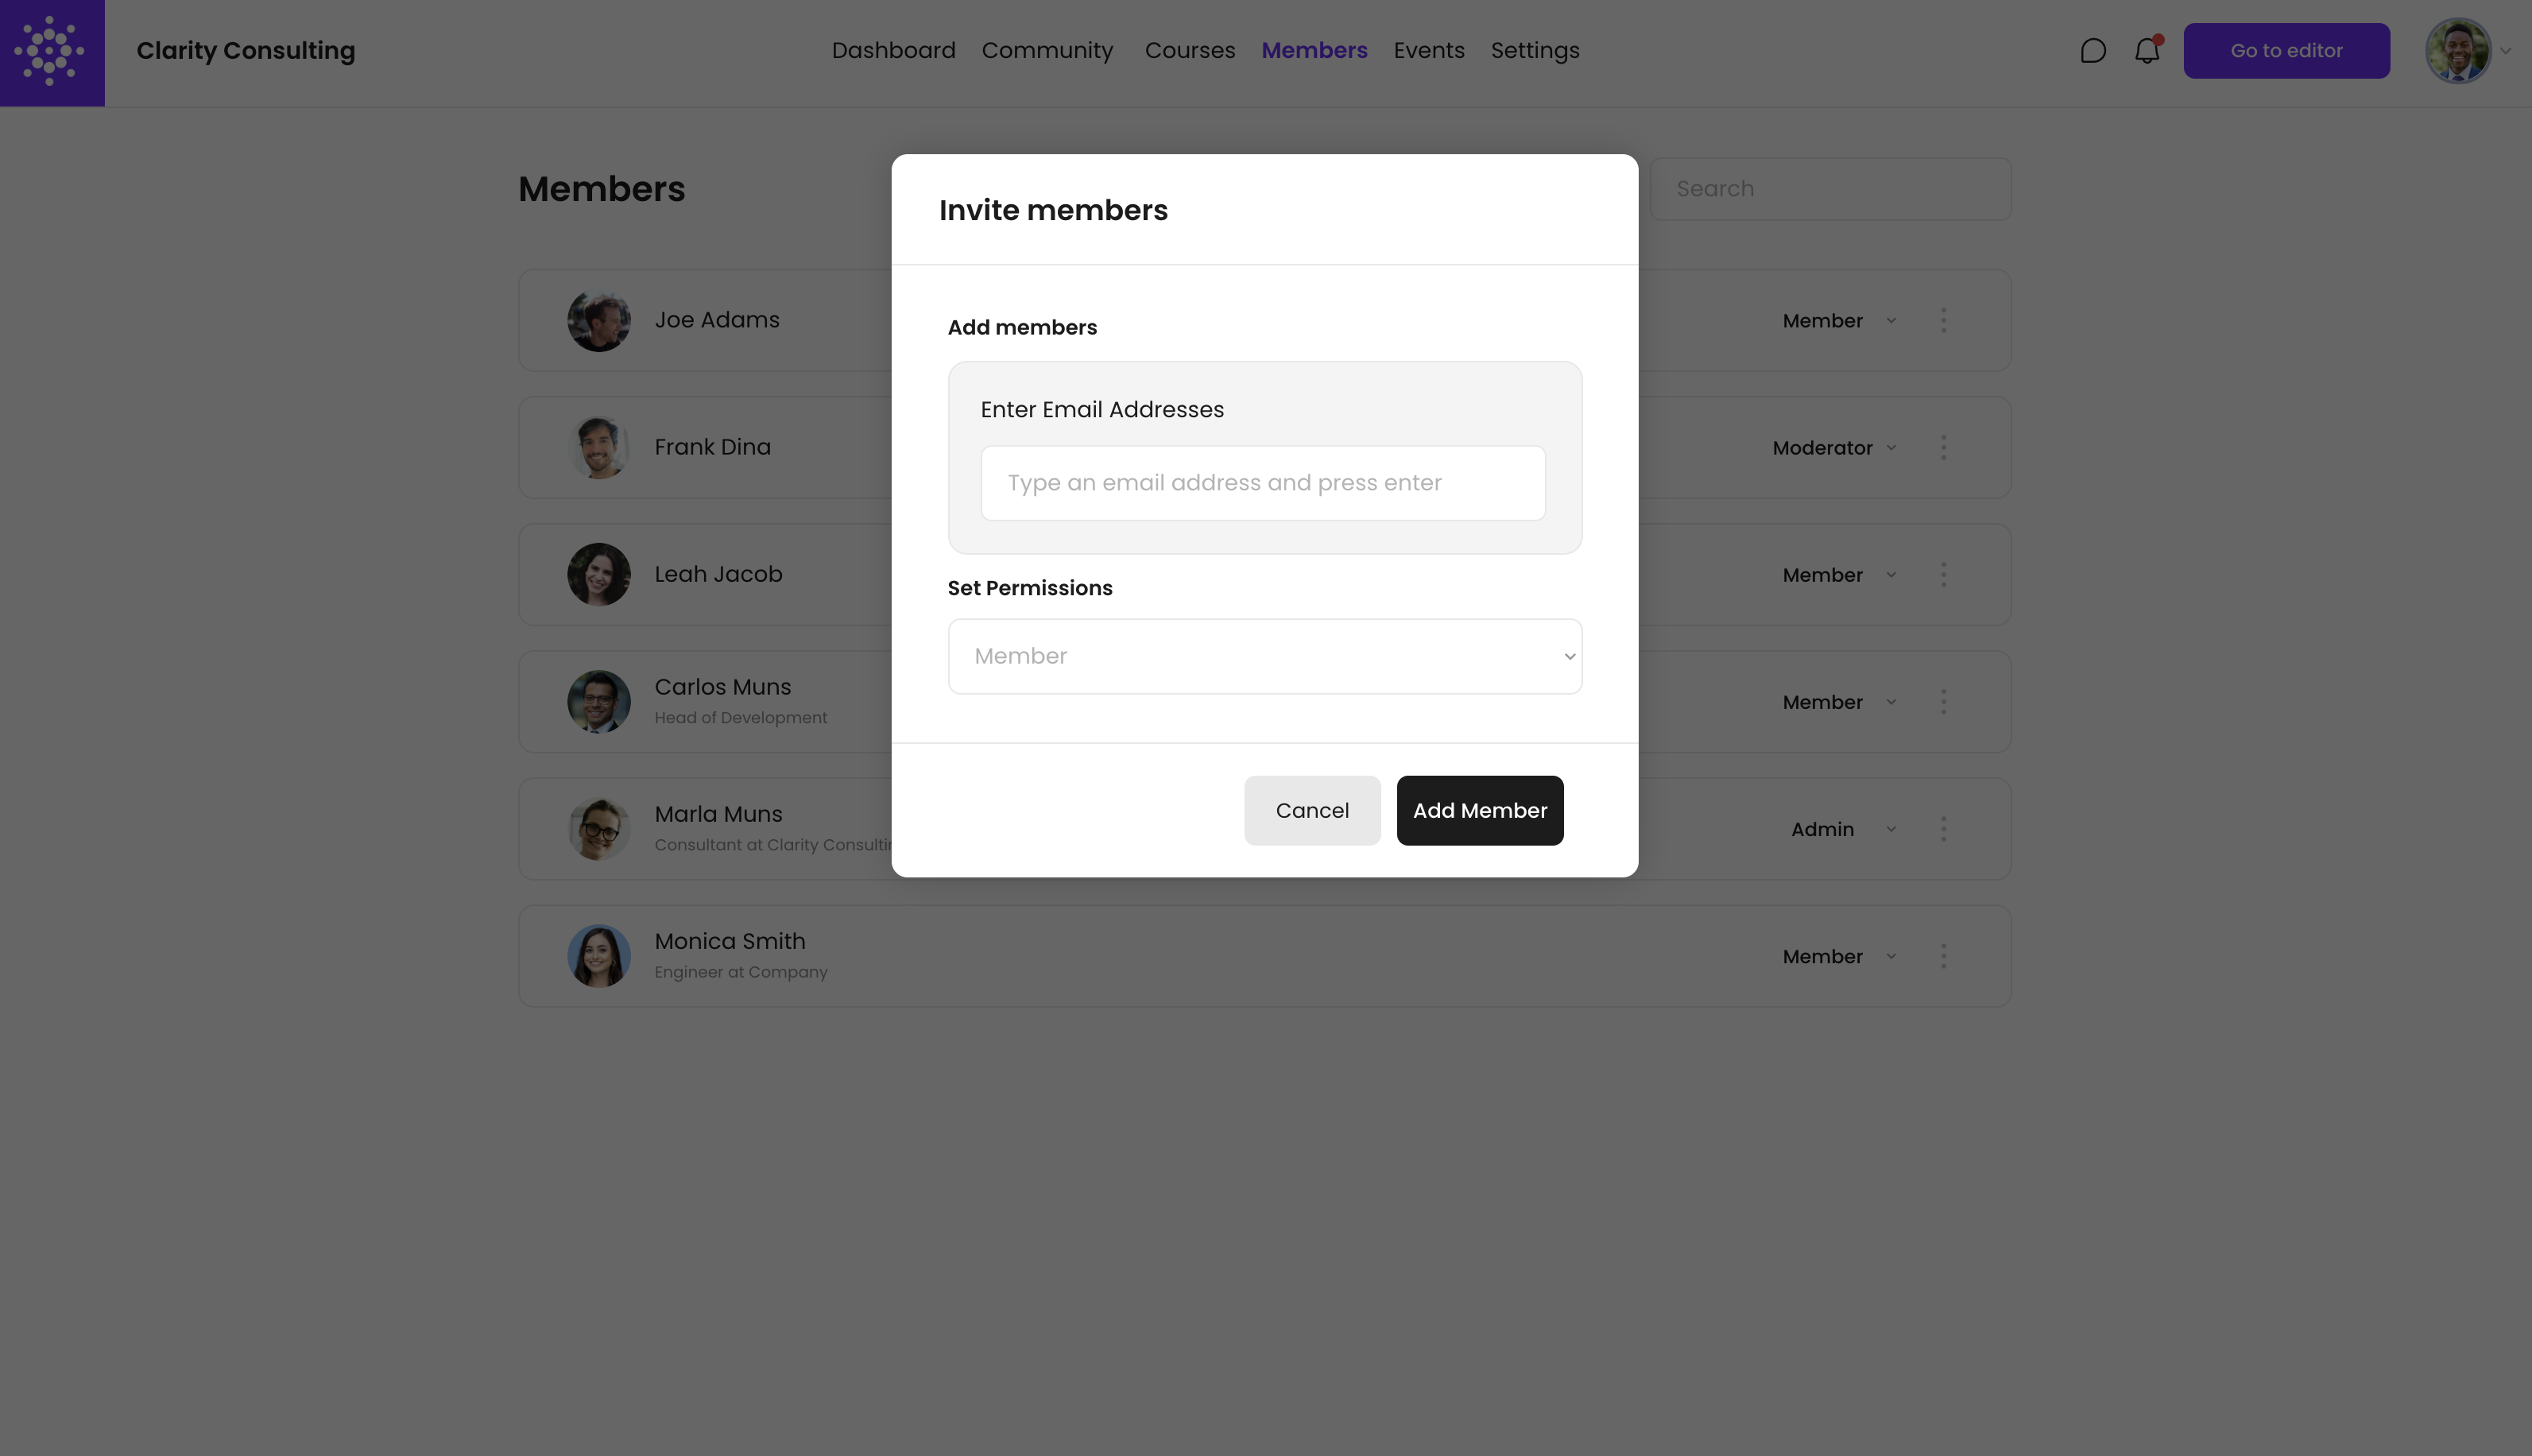
Note: This option will add any necessary access tags to your members, just as if they purchased through Flows.
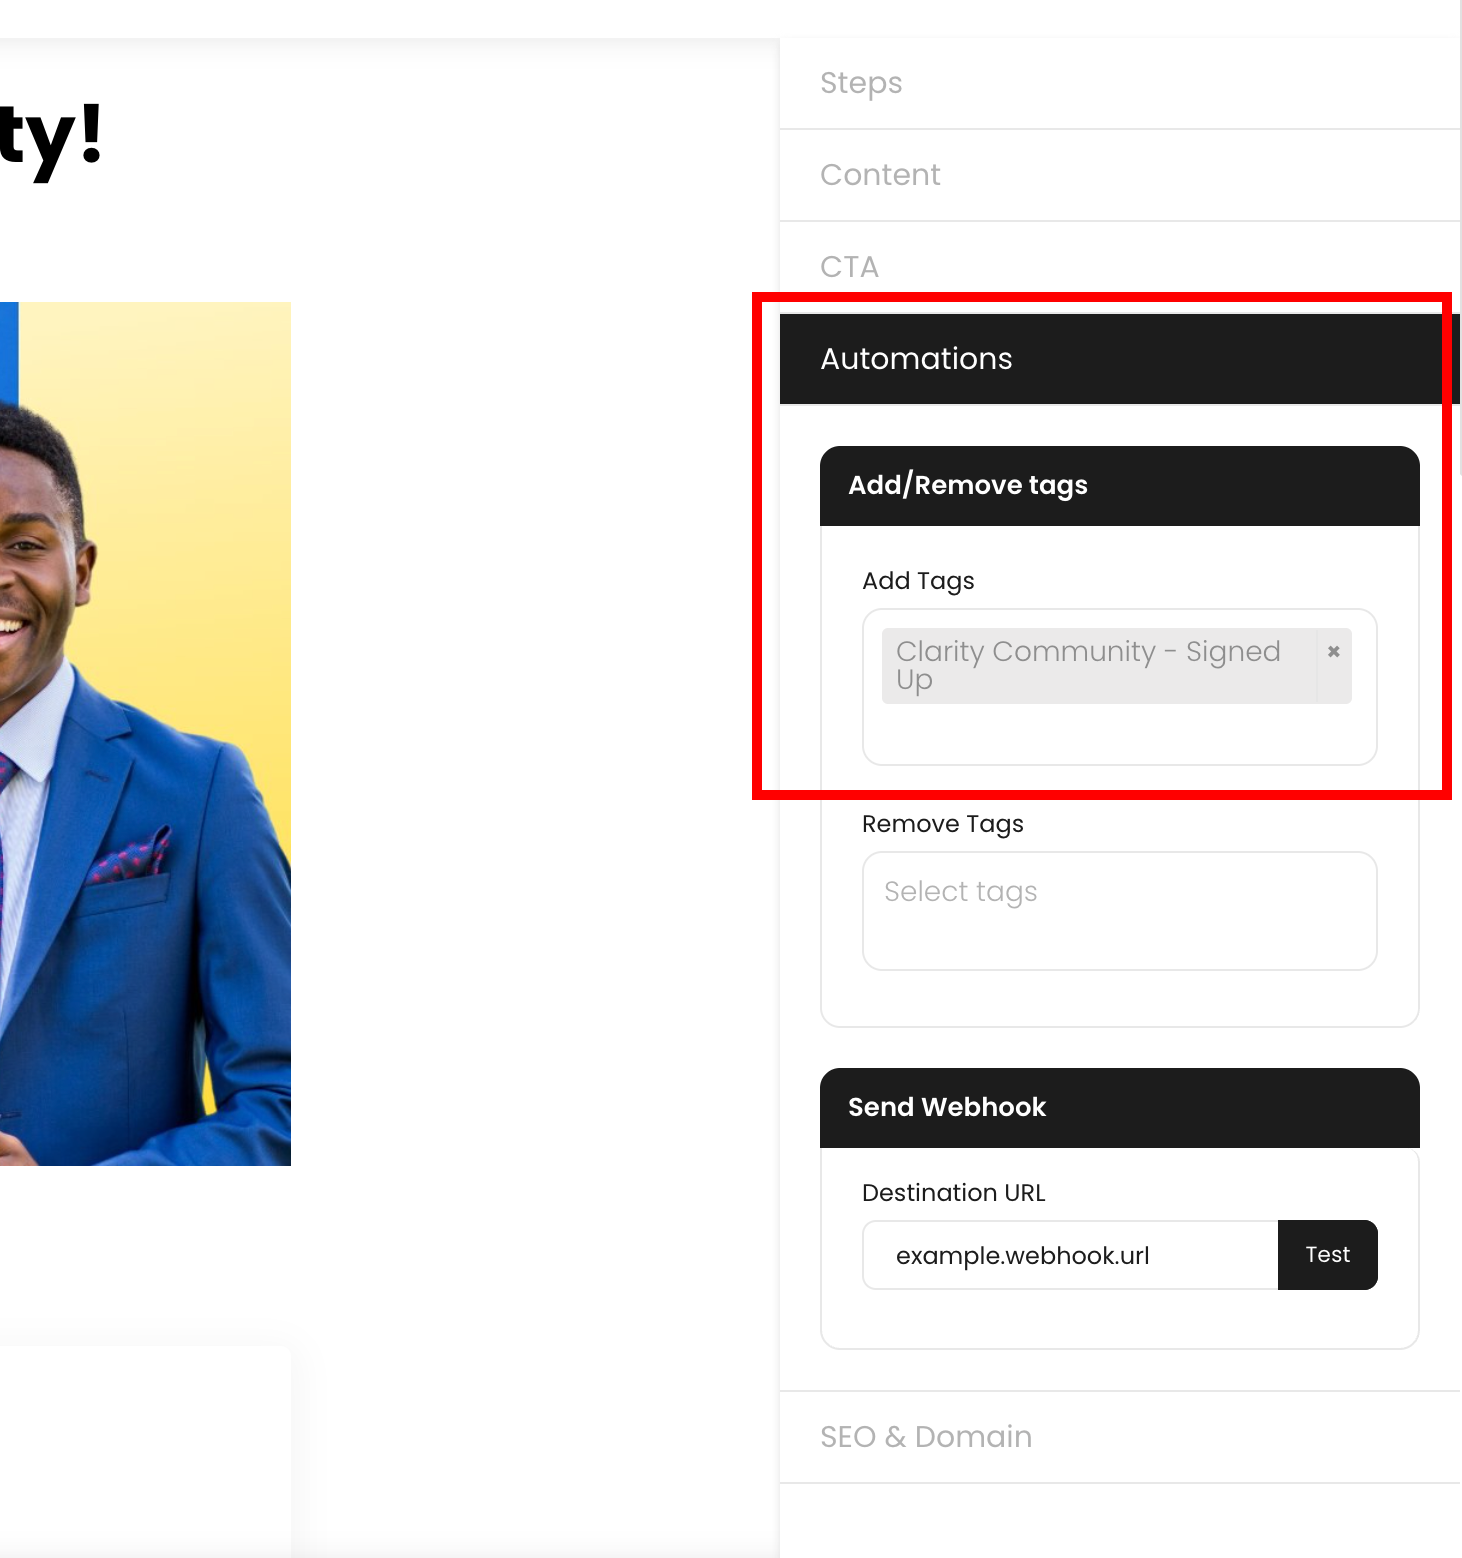
Member Tags and Automations
You can choose to add or remove tags to members or send webhooks when people join your community.
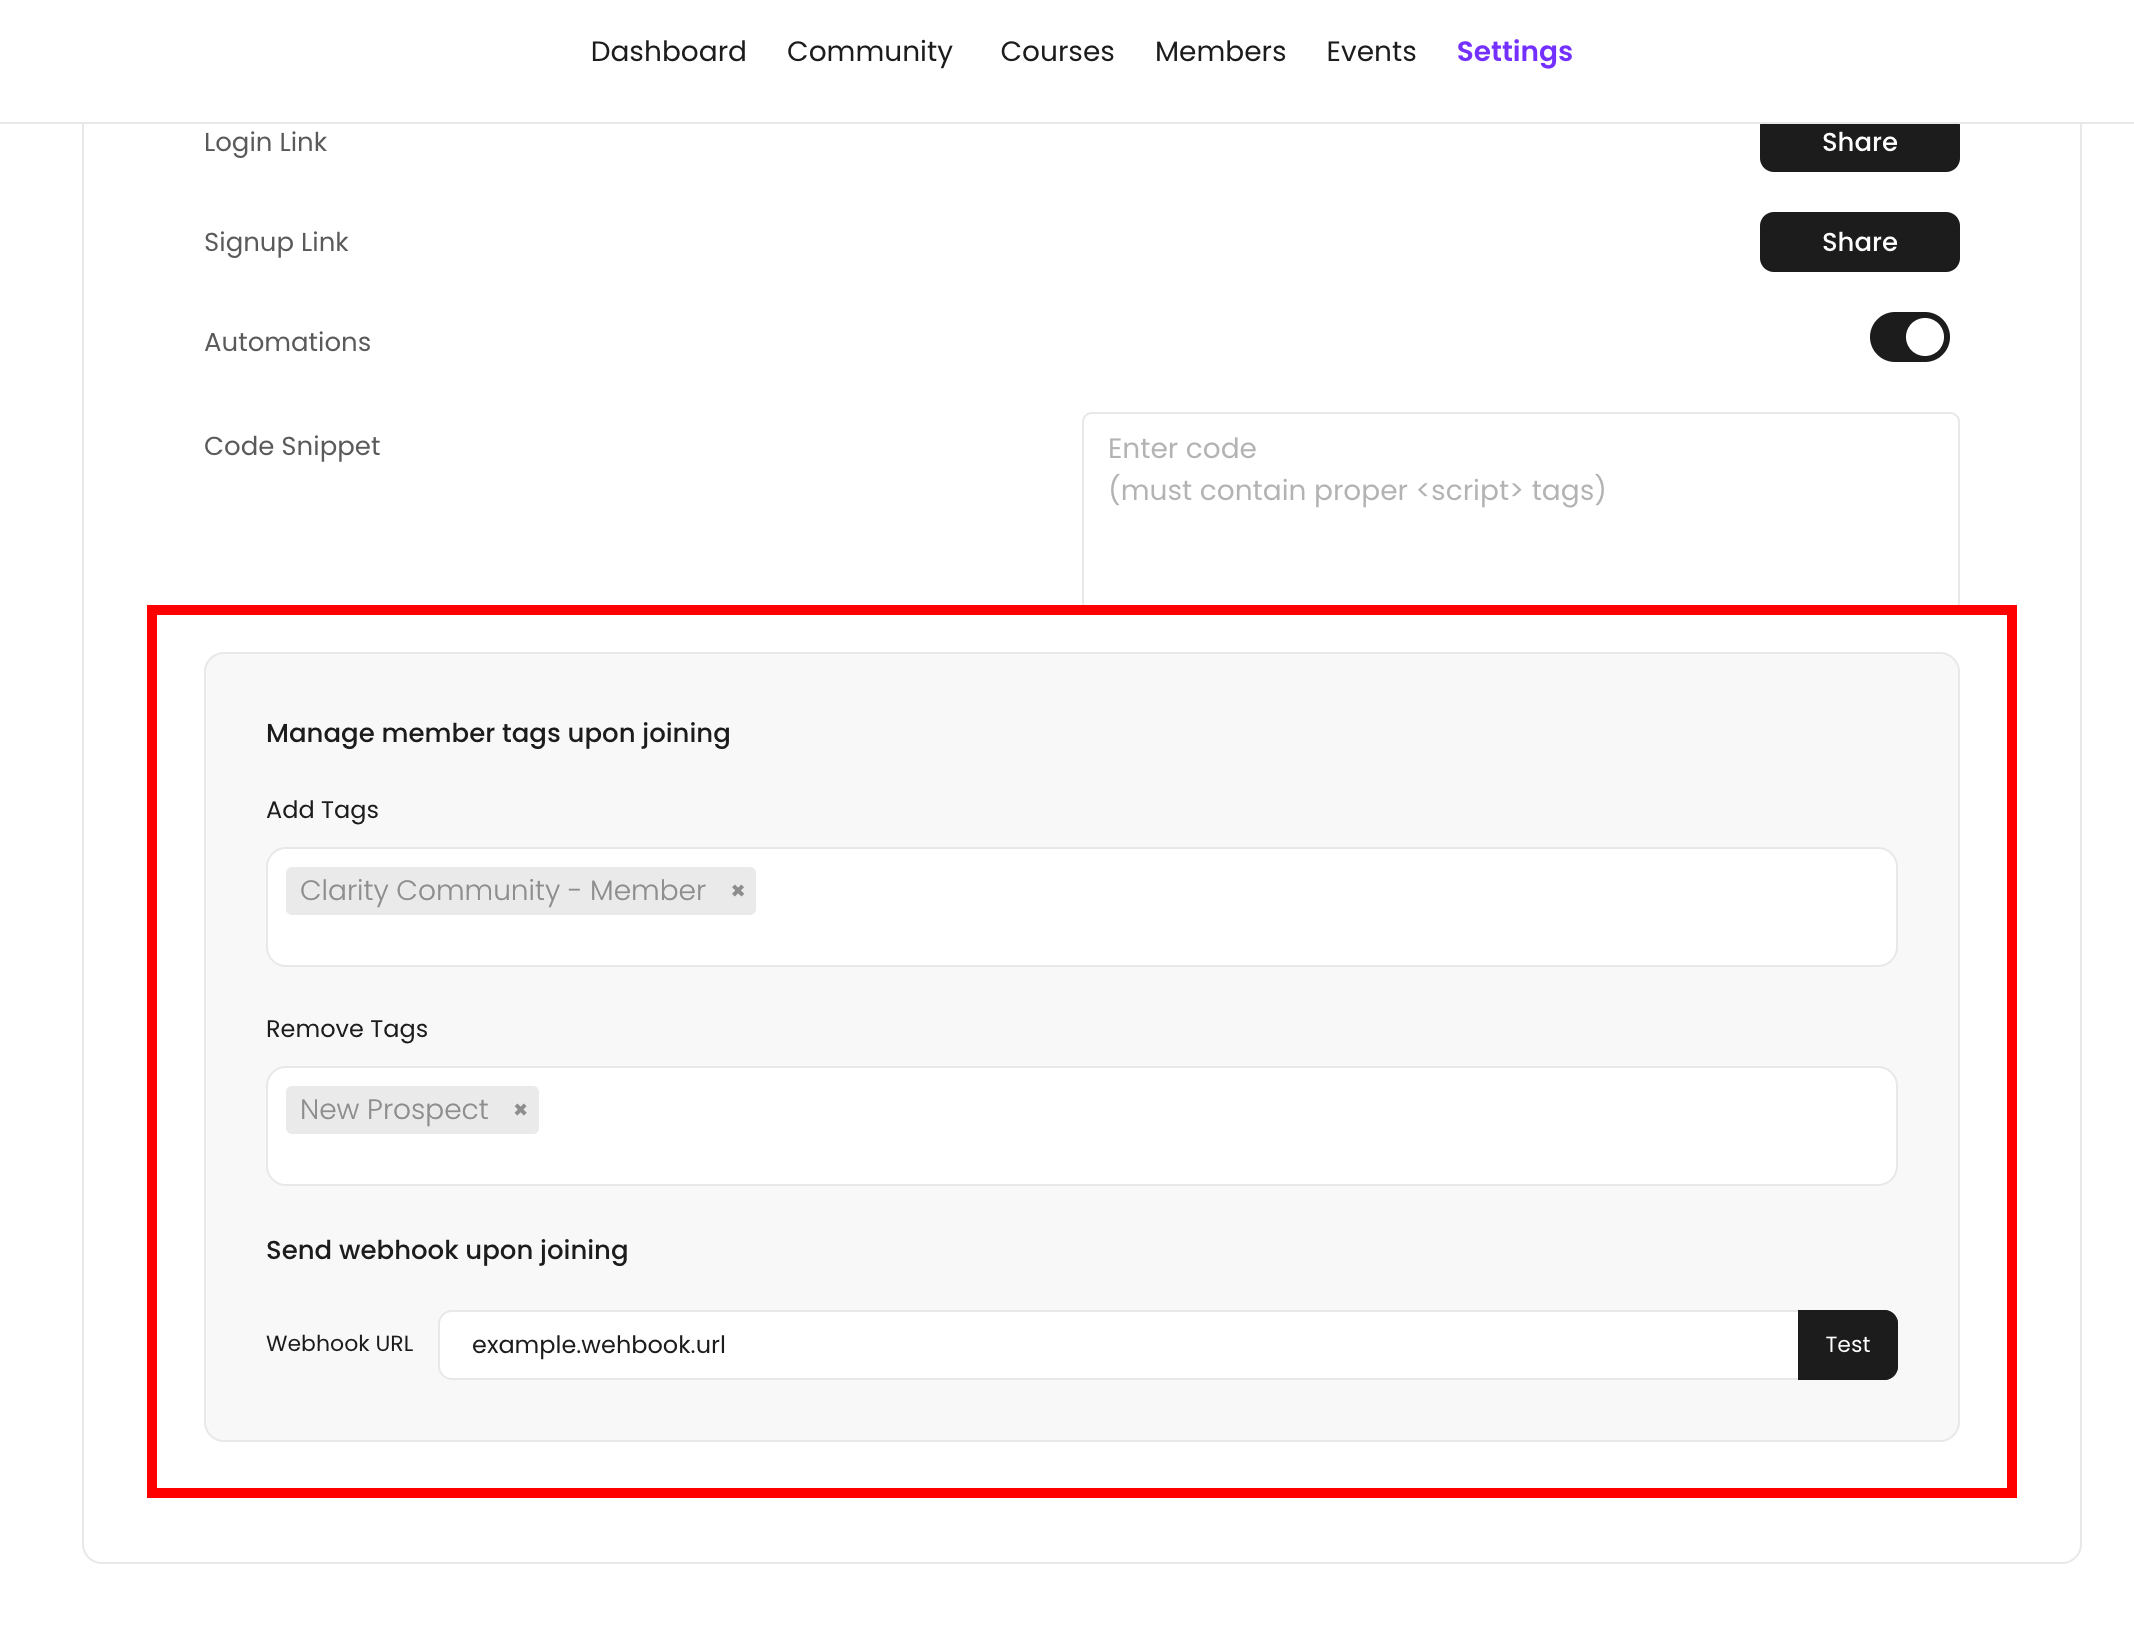
Manage Member Tags Upon Joining
Adding and removing tags to members when they join your community can be helpful in a number of cases like documenting member actions in VidSell People, or for communities where some content is tag restricted to only logged in members.
Send webhook upon joining
You can send webhooks to 3rd party platforms when someone joins your community/Engage area. This can be useful for keeping you community member information in-sync with your other platforms like CRM's or autoresponders.
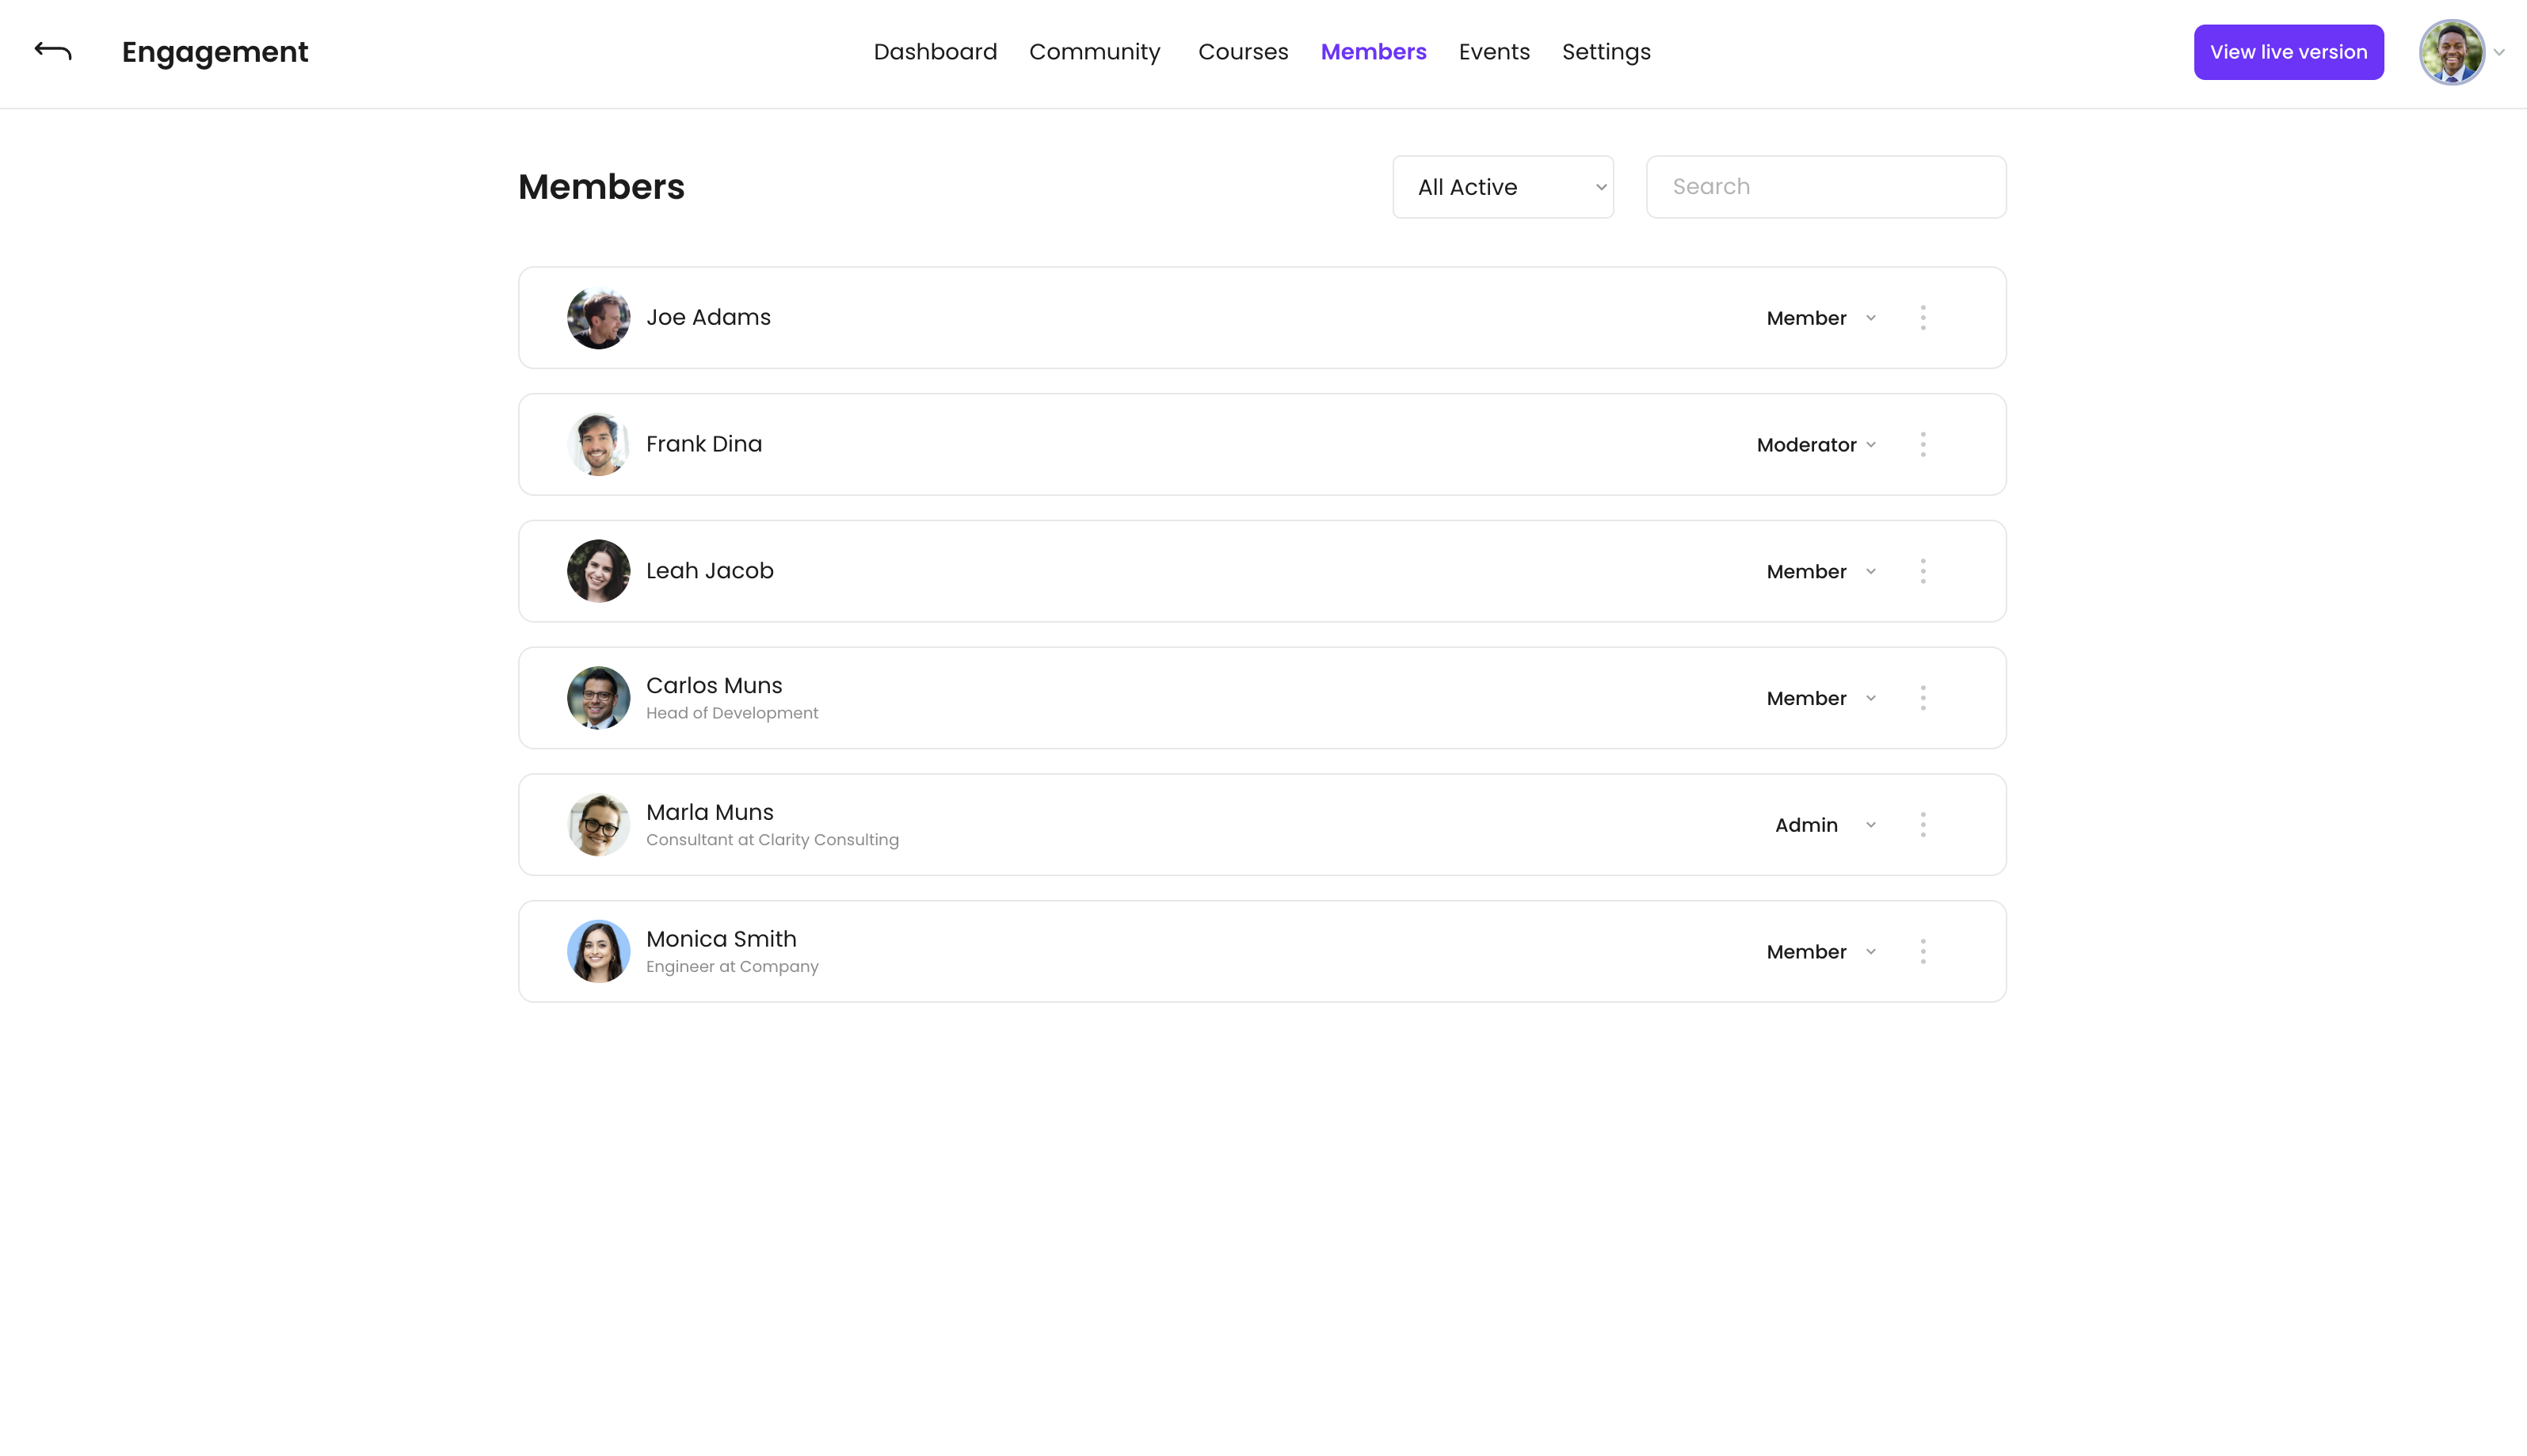
Managing Members
There are multiple ways you can see and manage the members within your Engage area.
Member Filtering

Filter through your members with these available options:
- All Active - See all active members on the top of the list, with inactive members below
- A-Z - Filter members by first name in alphabetical order
- Most Active - Filter by members with the most activity
- Recent Activity - Filter by members who have been most recently active
- Date Added - Filter by the date members were added to the community
- Removed - Filter by members who have been removed
- Banned - Filter by members who have been banned
- Pending Invites - Filter by members who have pending invites
Permission Levels
There are three permission levels your can choose from for your members with customizable options for those in each level: admin, moderator, and member.
Member Settings
Adjust the settings that apply to your Members Area.
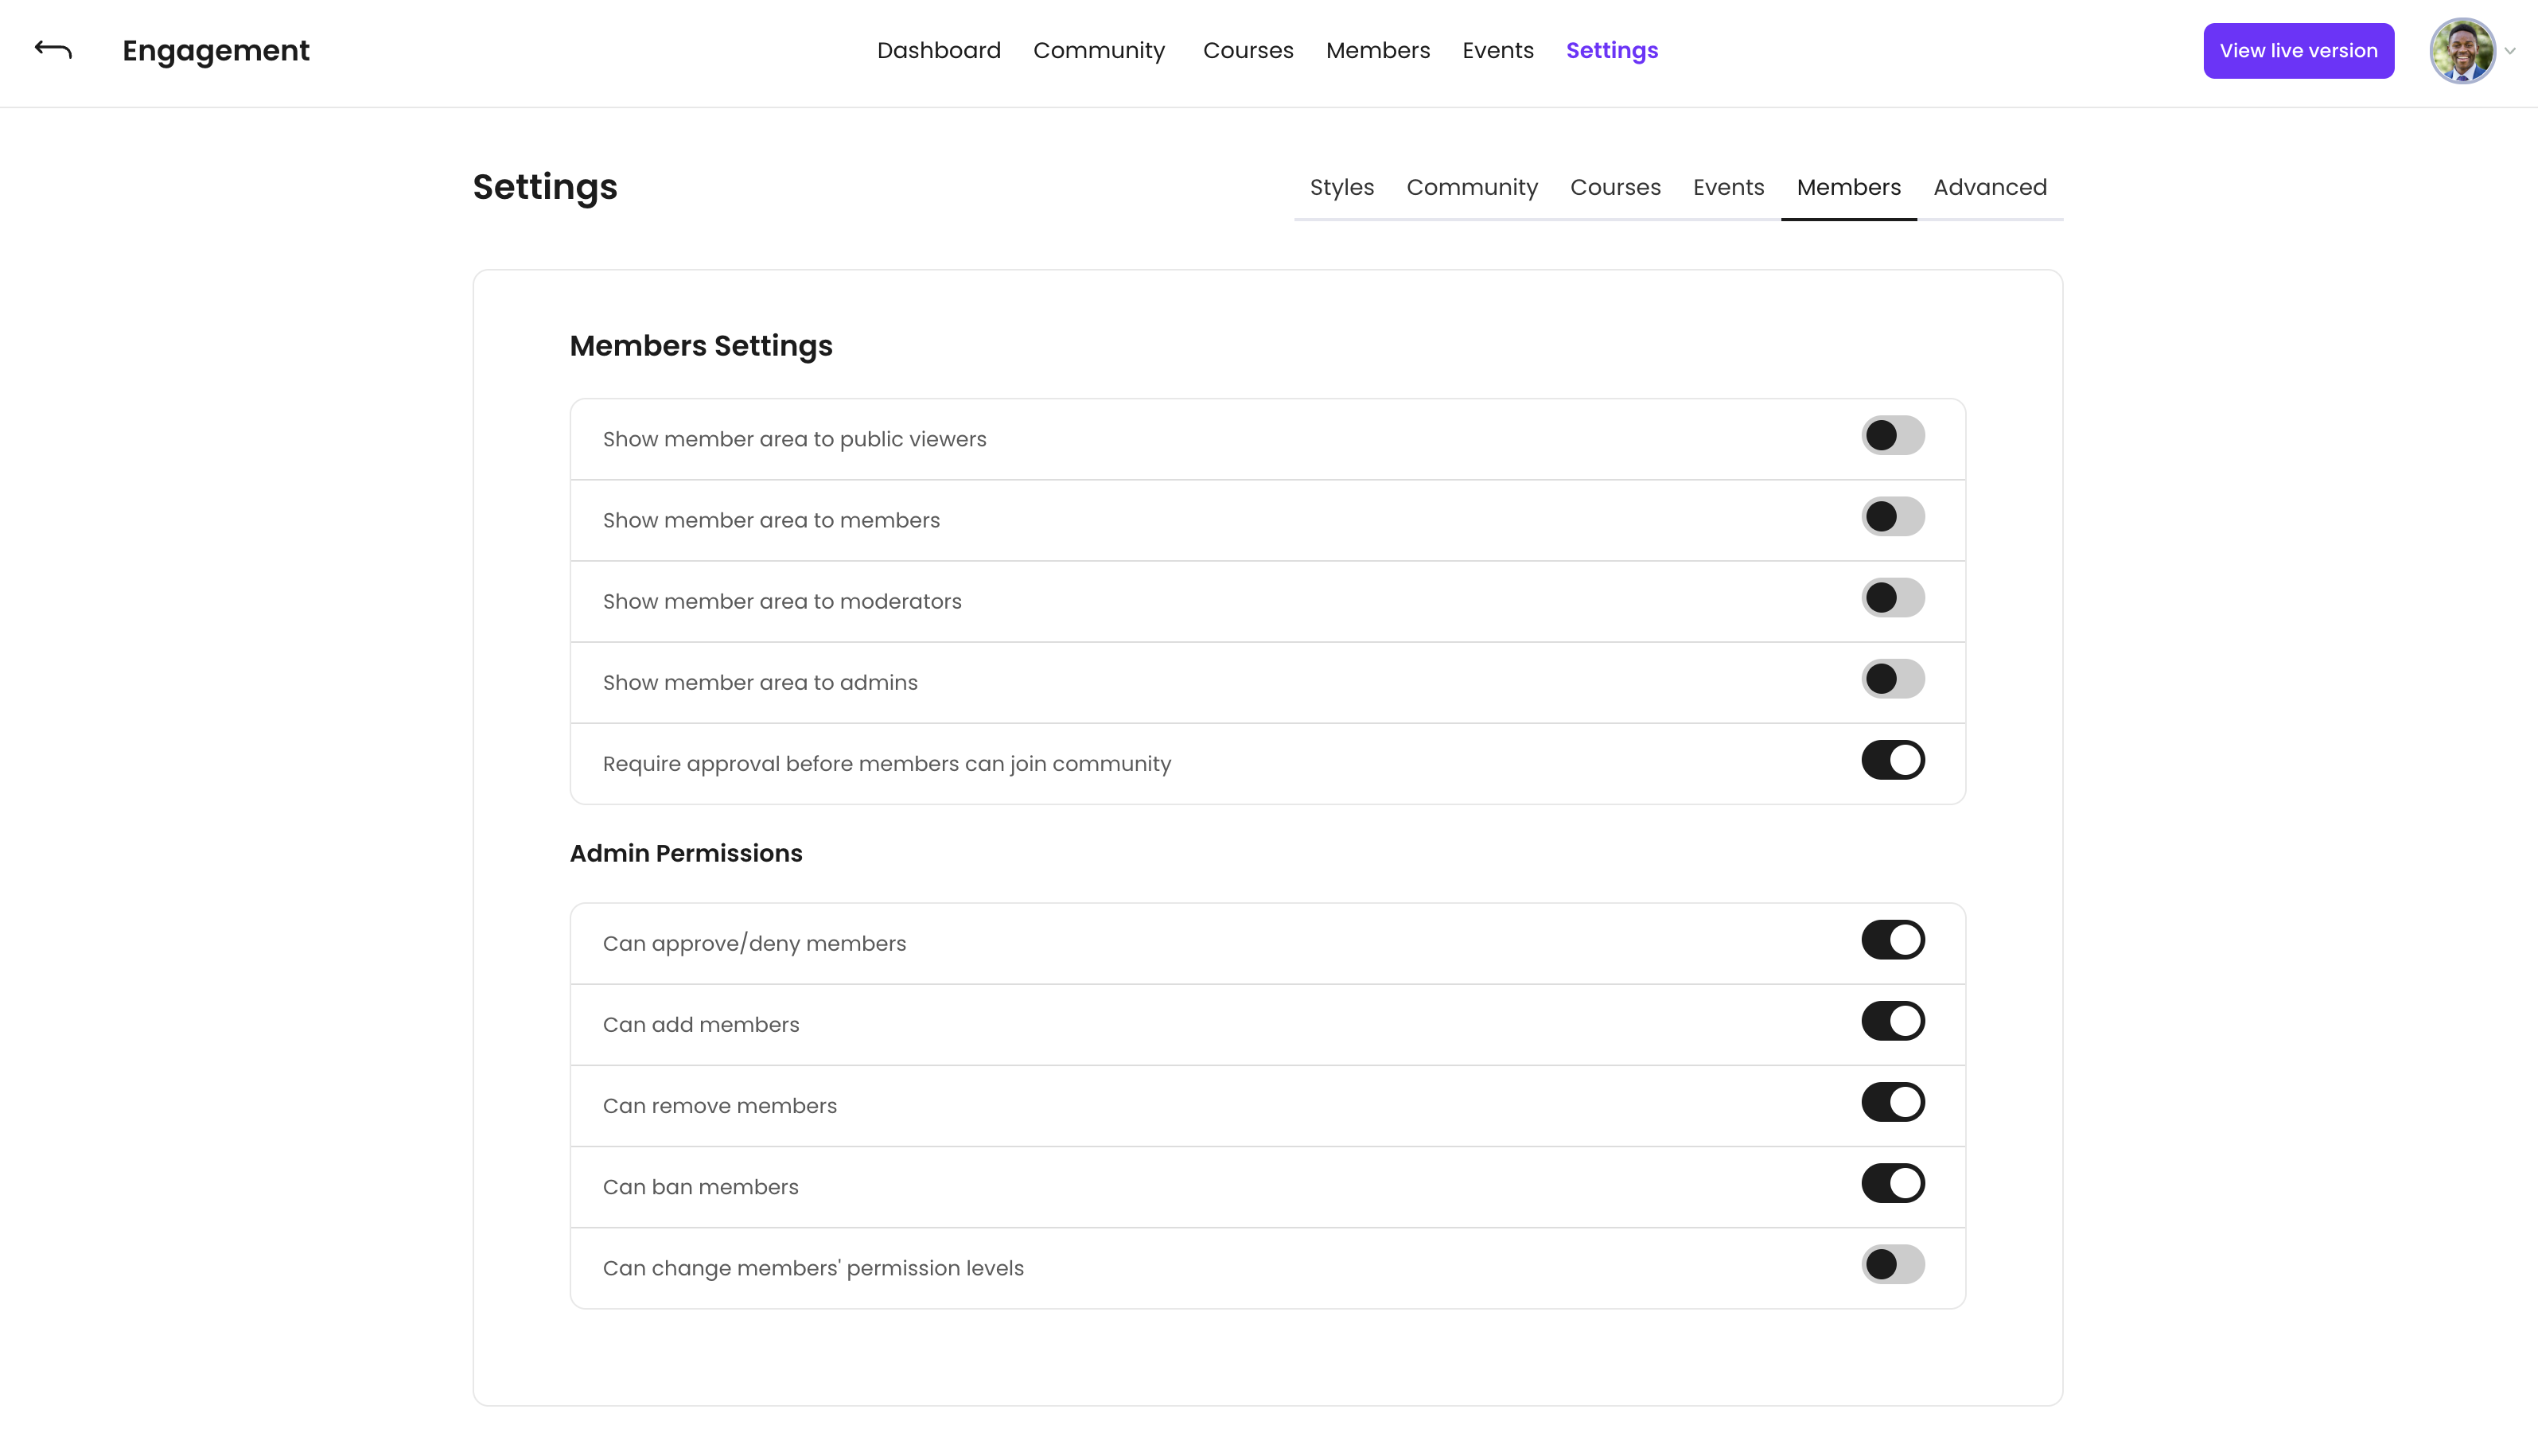
Members Area Visibility
You can toggle your Members Area off to make it not visible to public viewers, members, moderators, or admins.
Member Approval
Choose the option to require members to be approved before joining the community. This permission is available only to community admins, as well as adding/removing members, banning, and changing members' permission levels.